Ever sit down to play, ready to unleash your musical genius, only to discover your fingers have the coordination of a newborn deer on ice skates? We’ve all been there.
Your hands aren’t just tools – they’re your most valuable musical assets. Think of beginner piano finger exercises as CrossFit for your digits, minus the protein shakes and overly enthusiastic trainers.
These exercises do more than just improve your playing. They build strength, increase range of motion, and can even provide pain relief. It’s like physical therapy for your musical ambitions.
Why treat your fingers like second-class citizens when they’re the stars of the show? Proper conditioning transforms clumsy movements into commanding performances. Your future self will thank you.
Five-Finger Scales
Think of five-finger scales as the political primaries of piano technique. Everyone claims they’re important, but few understand their purpose. These five notes from Middle C to G are your musical foundation.

The pentatonic scale is not just a musical relic. It’s the blueprint for folk to jazz improvisation. Getting these five notes right is like building a stable foundation.
Your hand position matters more than your political views. Fingers should curve naturally, not flatten. Each finger must strike with equal conviction.
Theodor Leschetizky had a revolutionary idea: practice away from the piano. It’s like mentally preparing for a debate. This approach makes scale practice strategic, not just mechanical.
Here’s a comparison of effective versus problematic scale execution:
| Aspect | Quality Execution | Common Mistakes | Impact on Sound |
|---|---|---|---|
| Finger Pressure | Consistent weight distribution | Uneven force application | Smooth vs. bumpy texture |
| Wrist Position | Neutral, floating alignment | Stiff or collapsed posture | Fluid vs. restricted movement |
| Note Connection | Seamless legato flow | Disconnected articulation | Singing vs. robotic effect |
| Dynamic Control | Even volume throughout | Accidental accents | Uniform vs. erratic expression |
Uniform sound production separates pros from amateurs. It’s the difference between a polished speech and a rambling rant. Each note should carry equal weight.
The magic happens when you feel the scale as a single gesture. It’s about pattern recognition, not note-by-note computation. Your hand learns the terrain like a seasoned politician.
Perfecting these five notes creates muscle memory for everything you’ll play. It’s the basic training for both sonatas and concertos. Quality over quantity always wins, as uneven scales undermine credibility.
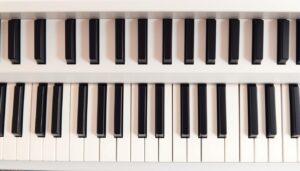
Hand Position Do’s & Don’ts
Your hands at the piano keyboard show more about your musical plans than your first chord. It’s like choosing between a fancy suit and sweatpants for a big event.
Getting your hand position right makes beginner piano finger exercises look like fine art. It’s what sets pros apart from hobbyists.

First, think about finger curvature. You want to hold a bubble gently in your palm. Not too tight, not too loose.
“The hand should appear as if resting naturally on a sphere, with fingers curved and ready to spring into action.”
Wrist alignment is key. Too high, and you look like a T-Rex trying to type. Too low, and it’s like dragging your knuckles.
Common Hand Position Mistakes
There are piano fashion disasters out there. These mistakes make beginner piano finger exercises harder than they need to be:
- Collapsed wrists that would make a yoga instructor weep
- Fingers so flat they could double as spatulas
- Thumbs tucked under like shy turtles
- Pinkies flying away like they’re too good for the party
Palm height is important. Your forearm should be parallel to the floor. This helps energy flow from your shoulder to your fingers.
| Position Element | Do’s | Don’ts | Why It Matters |
|---|---|---|---|
| Finger Curvature | Natural arch like holding a small ball | Flat fingers or extreme claw shape | Creates strength and control for exercises |
| Wrist Alignment | Level with keyboard, slight flexibility | Drooping or elevated dramatically | Prevents injury and ensures smooth movement |
| Thumb Position | Relaxed, ready to move under palm | Tucked tightly or sticking out awkwardly | Essential for scale passages and chord changes |
| Palm Height | Level with keyboard, not higher | Drooping down or lifted too high | Maintains proper arm weight distribution |
Remember, too much tension is bad for piano playing. If your hands feel tense, you’re doing it wrong.
Good hand position helps with beginner piano finger exercises. It builds technique, not bad habits. It’s like building a strong foundation.
Your hands should gently hold the keys, not force them. Think ballet, not wrestling. This makes exercises a step towards musical expression.
Stretching and Warming Up
Ever tried baking without preheating the oven? You get hockey pucks instead of cookies. Skipping hand warm-ups before playing is similar. Your fingers become stiff and unresponsive, like a dial-up modem.
Proper hand position starts with supple, prepared muscles. Think of your hands as precision instruments, not blunt tools. They need the same care a concert violinist gives their Stradivarius.
Science says cold muscles are like grumpy toddlers – they resist movement. Warming increases blood flow by up to 15%, giving your fingers the oxygen boost they need for technical excellence. It’s basic physiology, really.
The Professional’s Pre-Play Ritual
Start with heat therapy. A warm towel or heating pad for 5-7 minutes works wonders. Some pianists swear by warm water soaks – imagine giving your hands a spa day before demanding they perform Chopin.
Next comes strategic stretching. Hold each stretch for 30-60 seconds – enough time to hum your favorite aria or contemplate life’s mysteries.
- Gentle fist exercises: Make soft fists, then slowly unfurl fingers like flower petals opening
- Thumb opposition drills: Touch each fingertip to thumb, creating perfect O-shapes
- Finger lifts: Rest hand flat, lift each finger individually like a tiny elevator
- Wrist circles: Rotate wrists slowly in both directions, imagining drawing circles with your fingertips
These movements aren’t just random calisthenics. They increase range of motion and flexibility in the exact muscles used for playing. It’s targeted training for musical excellence.
Why This Beats Ibuprofen
Proper warming up prevents more than just bad performances. It’s your first defense against tendinitis, carpal tunnel, and other conditions that make musicians regret their life choices.
Most playing injuries don’t happen during intense passages. They accumulate during casual practice when hands aren’t properly prepared. It’s the musical equivalent of pulling a muscle while reaching for the TV remote.
| Stretch Type | Duration | Primary Benefit | Ideal For |
|---|---|---|---|
| Finger Extension | 30-45 seconds | Improves key reach | Large hand spans |
| Wrist Flexion | 45-60 seconds | Enhances fluidity | Fast passages |
| Thumb Circles | 30 seconds | Prevents stiffness | Chord playing |
| Palm Expansion | 60 seconds | Increases flexibility | Complex compositions |
The table above shows how different stretches target specific technical challenges. Notice how each addresses particular aspects of performance and hand position requirements.
Remember: flexibility isn’t about becoming a contortionist. It’s about giving your muscles the optimal working conditions to express musical ideas without physical limitations. Your hands should feel like well-oiled machinery, not rusty hinges.
Make this ritual non-negotiable. Your future self – the one without repetitive strain injuries – will thank you profusely. Probably while playing something magnificent.
Practice Plan
Most practice plans are too ambitious and unrealistic. Your beginner piano finger exercises should be more than just a forgotten New Year’s goal.
Think of your practice as a gourmet meal, not fast food. Start with finger exercises as your appetizer. Then, move on to your main pieces. Finish with something fun, like a mastered riff.
The secret to success is simple. Begin with 5-10 minutes of finger exercises. Then, practice your repertoire. End with something enjoyable. This order helps avoid burnout.
Consistency is key, not long, infrequent sessions. Daily practice of 20 minutes is better than a few long hours once a week. Regular practice builds muscle memory, not big, occasional efforts.
| Day | Time Allocation | Exercise Focus | Song Integration |
|---|---|---|---|
| Monday | 15 min exercises | Five-finger patterns | Scale-based pieces |
| Wednesday | 10 min exercises | Hand independence | Chord progressions |
| Friday | 12 min exercises | Velocity control | Dynamic pieces |
| Weekend | 8 min review | Weak spot addressing | Fun repertoire |
The table shows a flexible plan, not a strict schedule. Life can be unpredictable. Your plan should be flexible yet keep you moving forward.
Don’t forget to track your progress. Use a metronome to see how fast you’re getting. Record yourself every month. Seeing your improvement can be a great motivator.
Remember, you started for a reason. These exercises are your key to playing the music you love. Is fifteen minutes of your day worth it?
Conclusion
Finger exercises are not just boring drills; they are the secret sauce to musical greatness. They are like the foundation of a skyscraper—without it, everything crumbles. Proper hand position is your blueprint, ensuring every note lands with precision and ease.
Long-term benefits? Studies show consistent practice boosts skill retention, making complex pieces feel like second nature. It is not about restriction; it is about liberation. When your hands know what they are doing, creativity takes flight.
Integrate these exercises daily. Watch your playing transform from mechanical to magical. You are not just building finger strength; you are crafting musical freedom, one exercise at a time.

